Building a Commuter Bike: Parts Selection

Standard

With the frame decided on, I needed to make a few more key choices for parts to build up my new commuting bike. I knew that I was going to start out single speed and with a flat bar, but I wanted the option to switch to gears and a drop bar later on. I had also come across a couple things I definitely wanted to include, and they would further dictate my component choices.

While it may seem silly, the two things I knew I definitely wanted to have were a Sparse headlight and PDW full metal fenders.

The fenders were a more practical consideration.  I’d used Velo Orange fenders on my Raleigh and while they were an asthetically good match, the installation wasn’t straightforward (partly because the frame wasn’t really built for fenders) and they always seem to have a bit of a rattle.  I’d read a good review on the Blayleys blog and the appearance fit what I was going for.  The city version are 45mm wide and PDW says they work with 28-38mm tires.

The Sparse light I first saw on the Firefly Adventure Team bikes, and wanted it just because it seemed cool.  No other reason.  I could say because it was theft-deterrent, but I just like the way it looks.  Now the problem is that you can’t use the Sparse with center-pull or cantilever brakes, because it sits right where the cable should run.  I already had the Cross Check, so I’d committed to cantis.  V-brakes would be an option, but I wanted to keep

Extensive searching lead me to the mini-V brake.  They are linear pull brakes just like regular Vs, but with shortened arms so they work with road levers.  This chart at Gravelbike.com lists all the available models with arm lengths.  The Paul Mini-motos definitely had bling going for them, but I ultimately decided on TRP CX8.4, again mostly because I felt like they were a good asthetic match.  These would run the cable off to the side allowing for my Sparse light and would work with drop bar levers in the future.  In the meantime, I got a set of SRAM 700 flat bar levers that were designed for road-style short pull brakes.

I wanted to start single speed, but eventually add a cassette, so after finding an old-but-unused SRAM Rival compact crankset on craigslist, I picked up a Wolf Tooth drop-stop chainring.  This would work single speed, but would allow me to convert to 1×10 in the future if I wanted to.  I made a similar decision about the wheelset, picking something with a freehub body so I could use a single cog now and switch to a cassette in the future.

In the end, this is what I ended up with:

  • Frame: Surly Cross Check
  • Wheelset: H+Son TB14 with 105 5700 hubs (10-speed cassette
  • Brakes: TRP CX 8.4
  • Crankset/BB: SRAM Rival with GXP bottom bracket (craigslist find)
  • Chainring: Wolf Tooth 42t
  • Cog: Surly 17t and Surly spacers
  • Chain: Slightly used ultegra I had sitting around
  • Brake levers: SRAM 700 flat bar levers
  • Bar: Ritchey comp (craigslist)
  • Stem: Ritchey comp (to match the bar)
  • Seatpost: Richey WCS (again to match, they don’t make a comp in 0 offset, which I need for my relatively short legs)
  • Saddle: Fizik Antares (craigslist)
  • Fenders: PDW Full Metal, city version
  • Headlight: Sparse
  • Taillights: Fizik on the saddle + PDW Radbot for the seatpost and eventually on the rack

With all this together, I can put together a bike.

Building a Commuter Bike: Choosing a Frame

Standard

Surly Head Badge
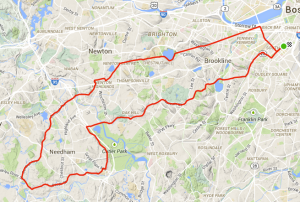
While I love my Raleigh, I wanted to get something a bit sturdier for year-round commuting.  I wanted a frame that could take fenders and racks obviously, but I was also looking for something that could change as my needs do.  For now, I have a short commute, only 2-3 miles each way depending on which location I’m working that day.  But given how much driving in Boston infuriates me, I also wanted the ability to go a bit further.

Being able to run single speed was important, as I thought this would be an easy way to get started and would allow for something lower-maintenance, especially during the winter.  I wanted the options of gears however, in case my commute gets further/hillier, or if I decide to use this bike for more than just the daily back and forth.

The other big choice was braking system – caliper vs. cantilever vs. disc.  My thinking was that disc was probably the best option, but also carried with it a higher cost, both for the braking system and for the wheels. For that reason, I was willing to consider cantis as well.  Calipers were last on my list, as they would likely limit

Finally, I needed something affordable.  I wanted this to be a solid bike, but it couldn’t break the bank.  For this reason I was looking mostly at made-in-Taiwan steel frames from a number of US companies.  I ultimately considered the following bikes:

  1. Soma Doublecross/Doublecross Disc: A steel frame that would take the racks, fenders, and wide tires that were my basic requirements.  Color options are nice and plain (grey and black), which is what I was looking for.  Comes with standard vertical dropouts
  2. Velo Orange Polyvalent: All the rack/fender attachments, canti brakes, semi-horizontal dropouts to allow for single speed setup.   But, it has a 1″ threaded fork.  While the classic appearance works with this frame, I felt like it would be limiting in terms of options for bars, as most are made for “oversized” 31.8mm threadless stems these days
  3. Soma Wolverine: This was released just as I was looking for frames.  Seemed like a perfect option – built for discs, has slider dropouts to allow for single speed, and even a split chainstay to allow for a carbon belt drive.  Seemed ideal, but was the most expensive option, and wasn’t yet available for purchase at the time I was looking
  4. Surly Cross Check: The tried-and-true option.  People seem to love this, or feel like it’s completely overhyped.  It checked all the boxes for me in terms of mounting options, tire clearance and horizontal drop outs.  Cantis instead of discs, though.  I also thought about the disc-brake Straggler, but that came at a higher cost and I wasn’t thrilled with the purple “Sparkle Pony” paint job.

Ultimately, as the image above suggests, I went with the Cross Check as I was able to get the prior year “Dark Dusky Blue” frameset at a bit of a discount, and that along with canti instead of disc brakes would make things easier on the budget.

Route Review: North Shore

Standard


Having just finished residency, and with a baby due any day, my wife and I found ourselves staring at each other a lot in our apartment in Boston.  On this particularly nice Monday late in June, we decided we needed to get out of town.  She would spend the day on Singing Beach in Manchester-by-the-Sea, and I would get a change of cycling scenery.

North shore route

Having done the Cape Ann loop a few times, I was looking for something new and so did some searching on Ride with GPS, and finally mapped out a route up the coast to Ipswitch and then back to Manchester-by-the-Sea on an inland route.

Off course
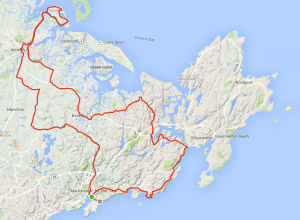
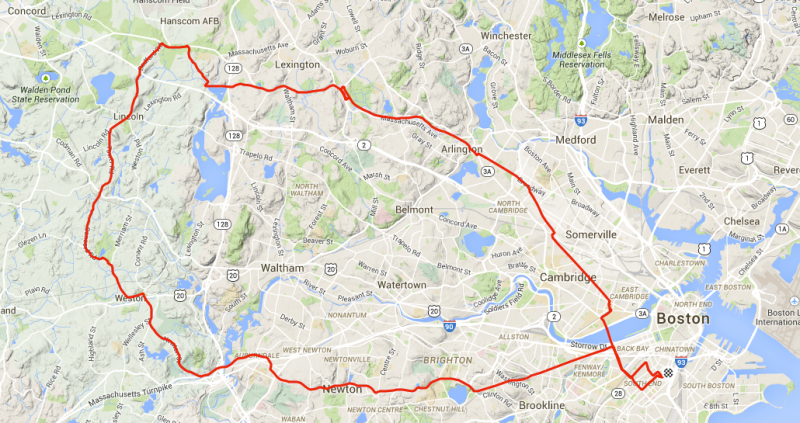
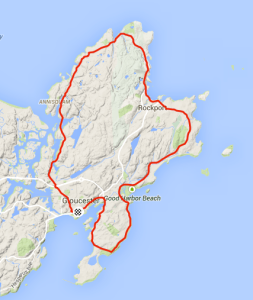
The ride starts up along the North Shore, on a route I’ve done before that has plenty of great ocean views.  Just before going onto Cape Ann, I turned west and headed up towards Ipswitch, then from there out Jeffrey’s Neck Road for some more water views, now of Plum Island Sound.

Looping back into Ipswitch the route now goes inland, and while not as traditionally New England scenic, it does go through a surprising amount of horse farms.  I was most surprised suddenly come upon a polo field with a game in progress just outside of Essex.

The complete ride is a bit over 40 miles, ending back at Singing beach.  Note that parking at the beach is only open to the public on weekends, so any other time plan on starting and stopping a couple miles earlier in town.

Route on Ride with GPS

Vermont Route 100

Standard

Route 100
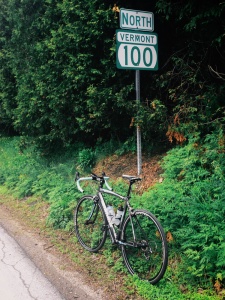
After the NE Randonneurs 100k, I was feeling confident about my ability to ride decent distances again.  My wife and I had planned a trip to Waitsfield, VT for the end of May, and it seemed like a good chance to get a bit more cycling in.

While Waitsfield is probably best known as a cycling destination for Lincoln Gap, Appalachian Gap and the other climbs on Vermont’s 6 Gap ride, I wasn’t prepared either physically or mentally to spend that kind of time biking on this vacation.  Instead, we arranged for my wife to drop me in Hartford, VT and then I would head over to Rt 100 and follow that over the “mini gap” of Granville Gulf and down the other side into Waitsfield, for a total of 108k.  She would drive up and meet me part way and then at our B&B.

RouteI had been nervously watching the weather all week, as it looked like there would be a good chance of rain.  I made an impulse purchase of a light, packable jacket earlier in the week, figuring worst case it staying in my pocket for the whole ride.  Well, just after we finished eating lunch at the Route 4 General Store, it started to drizzle.  Nothing too bad though, so we drove up the road away from the worst of the truck traffic and I set out.  Only to discover a mile later that the first part of my route was on packed-dirt roads.  Thankfully, the road stayed packed and my 25mm tires handled it just fine.

The first 20 miles or so were a long flat, only gradually climbing about 300 feet into Bethel, where I stopped for a cookie at the Bethel Village Sandwich Shop.  From there it was only another 12 miles or so along the White River before turning onto route 100 proper.

Route 100 itself is a nicely paved road, and the section I rode wasn’t too heavily travelled this time of year, as we were in a shoulder season after skiing stopped but before summer really began.  It was steady climbing up to Hancock, where we planned to meet for a snack at the Old Hancock Hotel.

While the milkshake was delicious, the news I received inside about a thunderstorm on the other side of the ridge was not.  Someone in the shop asked where I was headed, and when I said Waitsfield, told me that I probably had an hour or two before the storm hit.  With 25 miles to go and the Granville Gulf still to pass, I had some doubts, but pushed on ahead.  If it got bad I could always call for a bailout.

WaterfallThe road continued to climb steadily upward, increasing in pitch, but never becoming startingly steep.  I actually hit the top of the mini-gap without even really realizing it until I was headed back down again.  Then, just after passing Warren on the final descent into Waitsfield, the rain caught me.  It absolutely poured, and within minutes I could feel my shoes full of water.  It only lasted a few minutes though, and by the time I got to town I was already starting to dry off.

Perhaps the hardest part of the ride was the last little climb to the Inn at Round Barn Farm where we were staying.  After struggling up a short 20+% grade there, I was finally done.  Fortunately no one else was staying at the Inn and we upgraded to a room with a giant tub where I got to soak off all the road grit.

Route Review: Weston-Lincoln-Lexington-Arlington

Standard

Along with my 30 mile route to Needham, this ride up to Lexington is one of my standard quick rides to get in when I only have a few hours free.  It again leaves from downtown Boston and heads out Beacon Street.  This time though, you take a right onto Chestnut Hill Ave at the reservoir to get over onto Commonwealth.  Comm Ave then takes you through Newton and finally across the Charles River.  There is a carriageway here which allows you to avoid traffic if particularly heavy,

Comm ave is mostly a warm-up though, once you cross the Charles and then I-95 the roads get quieter and prettier.  There is a short but steep climb up Newton Street past Pine Brook Country club then things settle out through Weston and up Tower Road into Lincoln.  Coming out of the stop sign in Lincoln there is another steep section, made more painful by the fact that you have no momentum after wating at the 5-way intersection.  From there you descend into Minuteman State park and then cut back across just south of Lexington center (or take a detour up Waltham street to Mass Ave to pick up a coffee at Ride Studio Cafe).  Once into Arlington the best way to avoid traffic is to catch the Minuteman bikeway, but the entrance can be a bit tough to spot off Maple street.  The key is to watch for when you pass over it, then look for an entrance ramp just off to the right.

I used to just pick up Mass Ave once the bikeway ends in Arlington Center, but that was a constant frustration of traffic lights, cars parked in the bike lane, and potholes.  I find it actually it much nicer to cut over to Broadway instead then to Elm St through Davis Square into Porter and then onto Beacon/Hampshire back to MIT before finally crossing the Mass Ave bridge back to Boston.

Total route is 40 miles and for much of it, you really feel like you’ve gotten out of Boston.

Route on Ride with GPS

2014 NE Randonneurs 100k

Standard

Back after I started riding again, I set myself the goal of completing this 100k populaire as motivation to keep myself on the back.  After weeks spent on the trainer over the winter and slowly building up my mileage, it was time to actually do it.

The ride started at Hanscom Airfield in Bedford, with a crowd of about 70 standing around and riding circles in the parking lot to warm up.  It was fairly chilly at about 45˚, but was supposed to warm up later in the day.  We started off south from the airfield towards Lincoln, and I think I was a bit anxious as I started a bit quick and had a hard time finding a rhythm.  I settled in eventually though, and it was pretty smooth and flat rolling until the first hill in Bolton.  I was still feeling good though, and descended from there towards the halway point in Sterling.

I had heard most of the hills were to come in the second half, so I took my time to stretch and eat a PB&J and some pretzels before heading out again.  The next couple climbs were surrounding Harvard, MA, where I had always been told was the best spot for riding hills around Boston.  I stopped for at the top of the first on Bare Hill road to have a snack and strip off my arm warmers now that it was firmly in the 60s (I’d lost the leg warmers at the half-way stop).

After the descent, there was one more up and then down into Harvard proper, where I coasted by the semi-famous Harvard General store, just enjoying not pedaling for a moment now 45 miles into the ride.  Outside of Harvard was what seemed like the longest, and for me slowest, climb of the day.  Partway up I heard another rider say “This is the last one, right?” which was all the motivation I needed.

After that last hill, it was a relatively easy ride back to Hanscom.  At least it seems that way in retrospect, I’m sure I was getting a bit sore by then.  I ended up finishing right at 5 hours total time, including about a half hour stopped.  Overall I felt this was a success, and I even had the energy for an Ikea trip (and the resulting furniture assembly) afterward.  While my work schedule will keep me out of the other NER events in 2014, there is always next year.

Route Review: Hull and along the South Shore

Standard

South Shore 50With plans to do the NE Randonneurs 100k at the end of April, I had been slowly building up my distance.  I did a couple 100mi centuries when I was younger, and a metric century when I lived in Philly, but 100k is longer than I had ridden in a while.

This would be my last chance for a long ride before the actual event, so I wanted to do something more closely approaching the actual distance.  I found a this route while searching on Ride with GPS, and felt like it would be a good trial run.

Hull Windmill
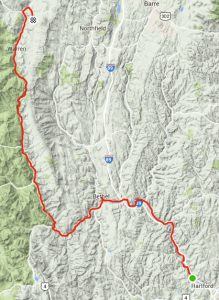
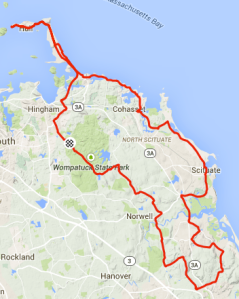
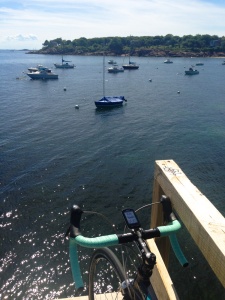
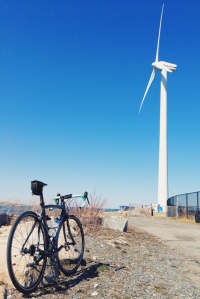
The ride starts in Wompatuck State Park where there is plenty of free parking, and heads from there up to the windmill in Hull before doubling back.  The ride was dead flat through Hull, and really all the way back along the coast down to Scituate.  It was pretty though – lots of views of the Bay and amazing homes on the shoreline.

Things became a bit less interesting once you turn back inland, with only a couple little hills to break things up.  There also wasn’t much in the way of services along here, so be sure to pack all the water/food you need.

By the time I got back into the State Park I was feeling pretty beat, and had to drag myself the last couple miles back to the car.  Overall the ride felt good though, and I wasn’t worried about being able to finish the 100k in a couple weeks.

Route on Ride with GPS

Winter training with the Sufferfest

Standard

After starting to ride again, I set myself the goal of doing the NE Randonneurs 100k ride in April 2014.  Unfortunately, winter came along too soon, and between short days and long hours at work (not to mention freezing temps) there wasn’t much time for training outside.  So, I found a sale on a relatively cheap fluid trainer, and set about riding inside.

And then I immediately got bored out of my mind.

Sure, Netflix helps, but I found I would just pedal along at a slow pace and wait for my butt to get numb, then I’d stop.  Personally, I need a bit more variety and motivation to keep with things.  I had a friend who used to watch cycling DVDs while on the trainer, so I went looking for something online and found the Sufferest.

These are a set of workout videos featuring footage from actual bike races with a number of different workout types (racing, climbing, intervals, etc).  Most videos start with a short warm up, then provide guidance suggestions about the level of effort and cadence you should be using in each section.  They are designed so you can use a HR monitor or power meter to really determine your exertion level, but they also give a “perceived effort” scale for those of use that approach this a bit more casually.  In addition, there are various forms of motivation along the way, mostly in the form of ridiculous commentary from a fictional directeur sportif (Grunter von Agony) and opponents for you to race including a rickshaw driver, hamster in a ball, and animated T. rex.

I started by trying out the “Extra Shot” video, which features 20 minutes of a spring classics race with short climbs and accelerations.  This one doesn’t come with any warm up or cool down, so you are on your own for that.  Overall, I enjoyed the ridiculousness of the commentary, and the music tracks and varied effort levels keep things interesting.

Being someone motivated by checking boxes, I then downloaded one of the training plans – the Novice (Road) Plan.  This gives you a 10 week schedule of riding 4 days a week.  Two are prescribed Sufferfest videos, while two are outdoor rides, usually one long ride a week.  I was pretty good about sticking to the videos, and would try to get in outdoor rides weather permitting.  If it was disastrous outside, I’d sometimes substitute a long trainer ride while watching a movie or something.  I’m sure you’d see bigger gains by strictly following the schedule, but I’m not out to win any races and given where my fitness was starting (i.e. nowhere), I definitely felt stronger by the end even without doing everything.

The types of info display on Sufferfest videos from oldest on the top showing only exertion, to newer with cadence and exertion, and newest with time in current segment and time to change in pace added.

The types of info display on Sufferfest videos from oldest on the top showing only exertion, to newer with cadence and exertion, and newest with time in current segment and time to change in pace added.

The videos themselves vary in terms of quality of both the race footage and the graphics based on when they were released.  Early videos have standard def video along with a simple number to show you cadence and relative exertion on a 1-10 scale.  Newer ones are in HD and have a timer showing you how much is left in the current interval and whether you are stepping up or slowing down for the next.  The newer ones are prettier for sure, but the workout is good regardless.

There are now >20 videos to choose from, and each is about $12.  You can also subscribe for a monthy fee via an iPad app to have access to all the available videos.  With all that choice, it can be hard to decide where to start.  In my experience they’ve all been worthwhile, but here are a few of my favorites:

  • Extra Shot: 20 minutes of a race with a few bergs thrown in for fun; no warm-up or cool-down, but good when you don’t have much time and want a quick ride
  • The Hunted: Warm up, then a big climb, then a race at the end.  Overall a nice mix of tempos.
  • ISLAGIATT (ISeemed Like A Good Idea AThe Time): Two hours of riding with 4 climbs and footage from the Giro.

Route Review: Boston to Needham

Standard

Boston-NeedhamWhile driving out of downtown makes for the prettiest, most traffic-free rides, it adds to the overall time needed and sometimes I just have a few hours to get a ride in.  After several variations, this has become one of my go-to routes if I only have a couple hours free.

The ride leaves from downtown Boston and heads out Beacon Street past BU and BC into Newton Center.  This initial section is flat and full of traffic lights.  There is a bike lane the whole way, so not too much fighting with cars.  Once you get through Newton the ride opens up a bit heading down Central Ave.  The nicest bit, however, is once you turn onto South Street in Needham which is tree lined and winding with small rollers.  Always see lots of other cyclists through this section, which I always wish were longer.  The return takes you back through the southern end of Newton and down the Goddard Hill descent to Jamaica pond.  Finally returning to downtown via Jamaica Plain and the Southwest corridor bike path.

No huge hills, and it often seems like a lot of riding in traffic to get to a relatively short section of nice road.  But, this is definitely doable if I have a late start at work or happen to get out early enough to get a quick ride in before dark.

Route on Ride with GPS

Route Review: Cape Ann

Standard

Cape Ann RouteA big barrier to starting to ride again was finding places to go, particularly when trying to contend with Boston traffic.  To avoid the second problem a bunch of my early rides were outside the city.  This ride starts in Gloucester, where there is plenty of parking in city lots, and travels counter-clockwise around Cape Ann.  Given that you are along the coast for the whole ride, it’s pretty flat although with some rollers.  Not much traffic either, although we were there in the fall after peak tourist season.  My wife joined me for this ride and it was her third time on a road bike, so definitely doable for someone without much experience.  While not terribly challenging, the views are fantastic and ending up back in Gloucester means there are great opportunities for a post-ride meal.

Ride with GPS Route